Introduction
If your calculator suddenly starts displaying unfamiliar results, it may not mean the calculator is faulty. Sometimes, a setting has simply been changed accidentally. Knowing how to reset Casio calculator settings can help students return the calculator to its normal setup quickly.
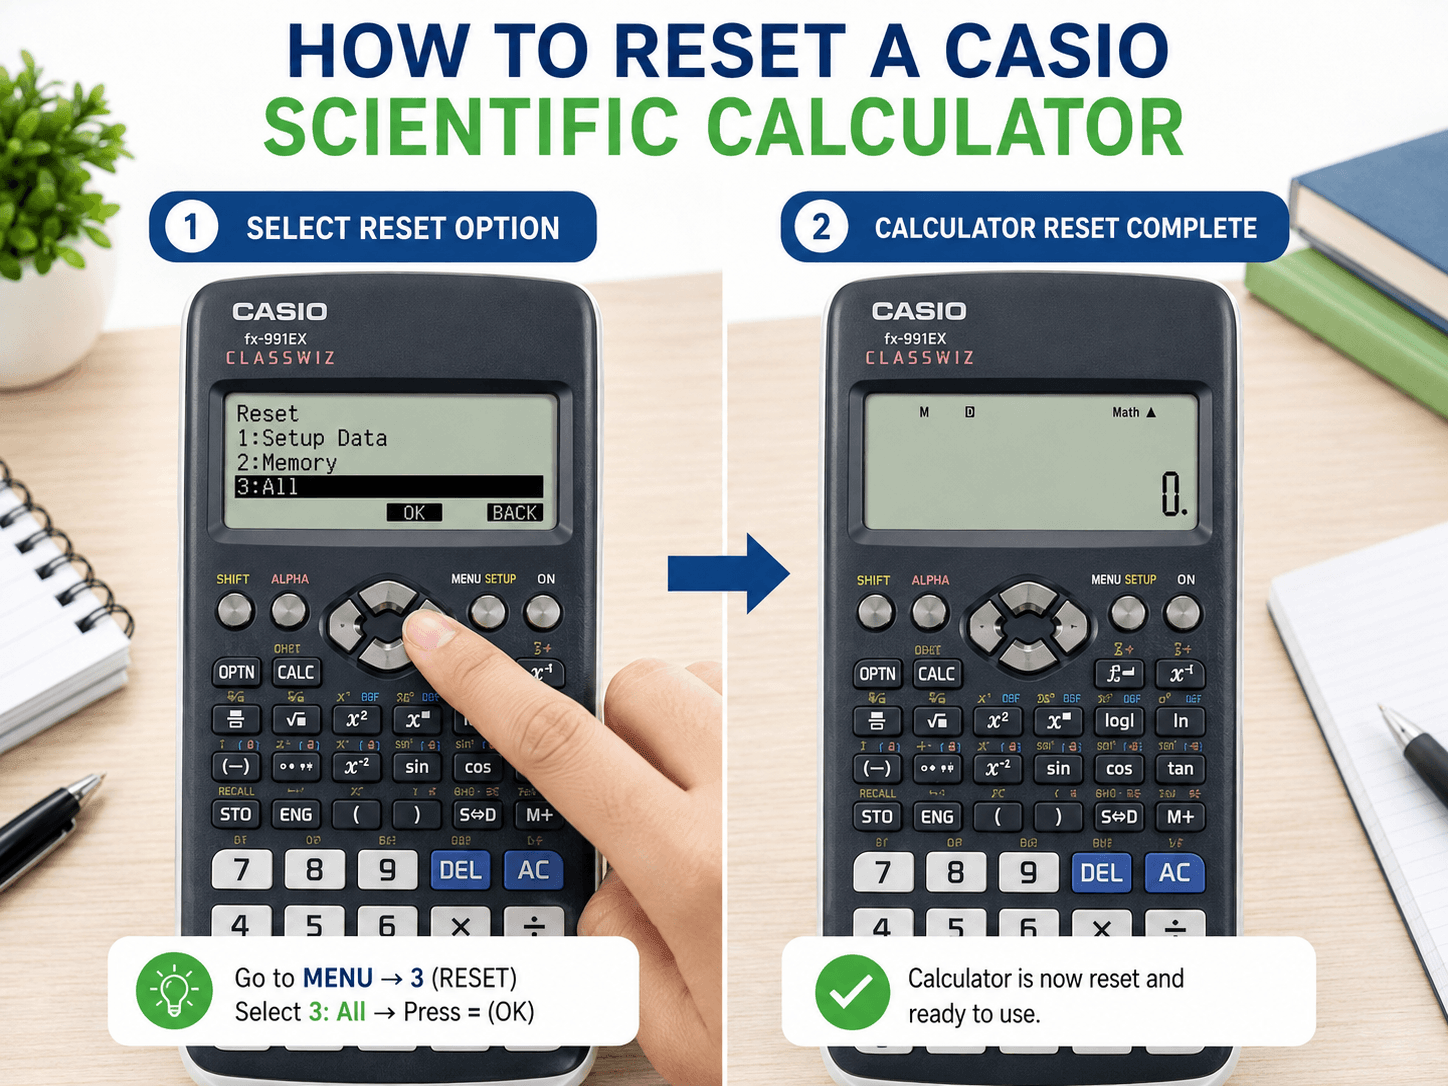
In this video, a quick reset method is demonstrated on a Casio scientific calculator: press SHIFT, then 9, select the reset option shown, confirm with the equals key, and finally press AC.
For PSLE Maths students who use an approved calculator during practice, it is also important to understand that reset menus can differ between calculator models. Students should therefore become familiar with their own calculator before an examination.
The Question / Scenario Explanation
Source: Your calculator is lying to you. Here’s the 3-second fix.
Imagine entering a familiar calculation into your calculator but receiving an answer in an unexpected format.
The mathematics may be correct. The issue could simply be that someone changed a calculator setting.
Depending on the calculator model and the setting selected, students may encounter unfamiliar displays involving fractions, decimals, angle modes or other formatting options.
In the calculator shown in the video, the reset sequence demonstrated is:
- Press SHIFT.
- Press 9 to open the reset menu.
- Select 3.
- Press = to confirm.
- Press AC.
Important: The exact reset sequence can vary between Casio models. A reset may also restore settings or stored values to their defaults, so students should check the instructions for their specific calculator before using this sequence.
Step-by-Step Solution / Explanation
Step 1: Check Whether the Maths Is Actually Wrong
Before resetting anything, try a very simple calculation whose answer you already know.
For example:
\( 8 \times 7 = 56 \)
or:
\( 100 \div 4 = 25 \)
If the calculator still displays something unexpected, check its current settings and display mode.
Step 2: Open the Reset Menu
On the calculator demonstrated in the video, press:
SHIFT → 9
This opens the reset menu.
Again, students should note that another Casio model may use a different menu layout or button sequence.
Step 3: Select the Reset Option
In the video demonstration, option 3 is selected.
The calculator then displays a confirmation screen before completing the reset.
Students should read what is shown on the screen rather than pressing buttons automatically. This helps prevent accidentally resetting something they intended to keep.
Step 4: Confirm the Reset
Press the = key to confirm the selected reset option.
Once confirmed, the calculator restores the relevant settings according to the selected reset command.
Step 5: Press AC
Finally, press AC to return to the normal calculation screen.
The calculator should now be ready for a fresh calculation.
Step 6: Test the Calculator Again
Do not assume that everything is correct simply because the reset is complete.
Test a familiar calculation:
\( 12 \times 5 = 60 \)
Then try a fraction:
\( \frac{1}{2} + \frac{1}{4} = \frac{3}{4} \)
If the outputs are now displayed as expected, the calculator is ready to use.
Key Concepts Students Must Know
- A calculator follows its settings: An unusual display does not automatically mean the calculator is broken.
- Different modes affect output: Certain calculator settings can change how answers are displayed or interpreted.
- Reset procedures are model-specific: Students should learn the controls of the calculator they actually use.
- Read the screen before confirming: Do not memorise button presses without checking what the menu says.
- Always verify after resetting: Use a simple known calculation to make sure the calculator behaves as expected.
- Calculator skills support, rather than replace, Maths skills: Students should still estimate and check whether an answer is reasonable.
Exam Tips / Common Mistakes
Exam Tips
- Use the same calculator regularly during practice so its buttons and menus become familiar.
- Check your calculator well before an examination rather than changing unfamiliar settings at the last minute.
- Test simple calculations after changing or resetting settings.
- Use estimation to decide whether a calculator answer is reasonable.
- Make sure you understand when an answer is being displayed as a fraction, decimal or another equivalent form.
- Keep manual Maths skills strong so you can recognise an obviously incorrect calculator entry.
Common Mistakes
- Assuming every strange answer means the calculator is faulty: The problem may simply be a changed setting or incorrect input.
- Using another model’s reset sequence blindly: Different calculators may have different menu structures.
- Resetting without reading the confirmation message: A reset can restore settings or other stored information to default values.
- Trusting every calculator answer: Entering \(32 \times 6\) incorrectly will still produce the wrong answer even if the calculator is working perfectly.
- Waiting until exam day to learn calculator functions: Calculator familiarity should be developed during regular practice.
Parent Insight
A scientific calculator is a useful tool, but students should not become dependent on it without understanding the Maths behind their answers.
If your child says that the calculator is “giving the wrong answer”, encourage them to perform two checks. First, confirm that the calculation was entered correctly. Second, check whether the calculator is displaying the result in an unfamiliar mode or format.
It is also useful for children to practise with the same calculator consistently. Familiarity reduces unnecessary stress and helps them notice quickly when something on the screen looks different.
Most importantly, students should build the habit of estimating before accepting a calculator result. If they expect an answer around \(300\) but the calculator shows \(30{,}000\), that should immediately trigger a second look.
Conclusion
When a calculator begins showing unfamiliar results, a changed setting may be responsible. In the model demonstrated in the video, the quick reset Casio calculator sequence is:
SHIFT → 9 → 3 → = → AC
However, students should always check the menu displayed on their own calculator because reset procedures can differ between models.
After any reset, test the calculator with a simple calculation and make sure the display behaves as expected.
And remember: a calculator can perform the calculation, but the student still needs to decide whether the answer makes sense.
Visit our PSLE Maths homepage: Explore PSLEMathsTuition
Read more PSLE Maths guides: Visit Our PSLE Maths Blog
Start here (limited slots weekly):
Free Trial: Click Here…
Enrol: Click Here…
Explore our main tuition brand approach here: Click Here…